What is ProsperOps?
ProsperOps is an automated commitment management platform that optimizes AWS Reserved Instances and Savings Plans in real-time. Instead of manually tracking and adjusting your commitments, ProsperOps dynamically buys, sells, and exchanges them to ensure you get the best savings possible while keeping your infrastructure flexible.
With ProsperOps, teams can:
- Maximize their savings without the operational burden.
- Increase their Effective Savings Rate (ESR) by automatically optimizing commitments.
- Eliminate the risk of overcommitting by continuously adjusting based on actual usage.
What does this Integration do?
Leveraging the ProsperOps Data Export feature, you can now bring in ProsperOps key metrics into CloudForecast’s Daily Cost Group Reports as an optional “add-on” module:
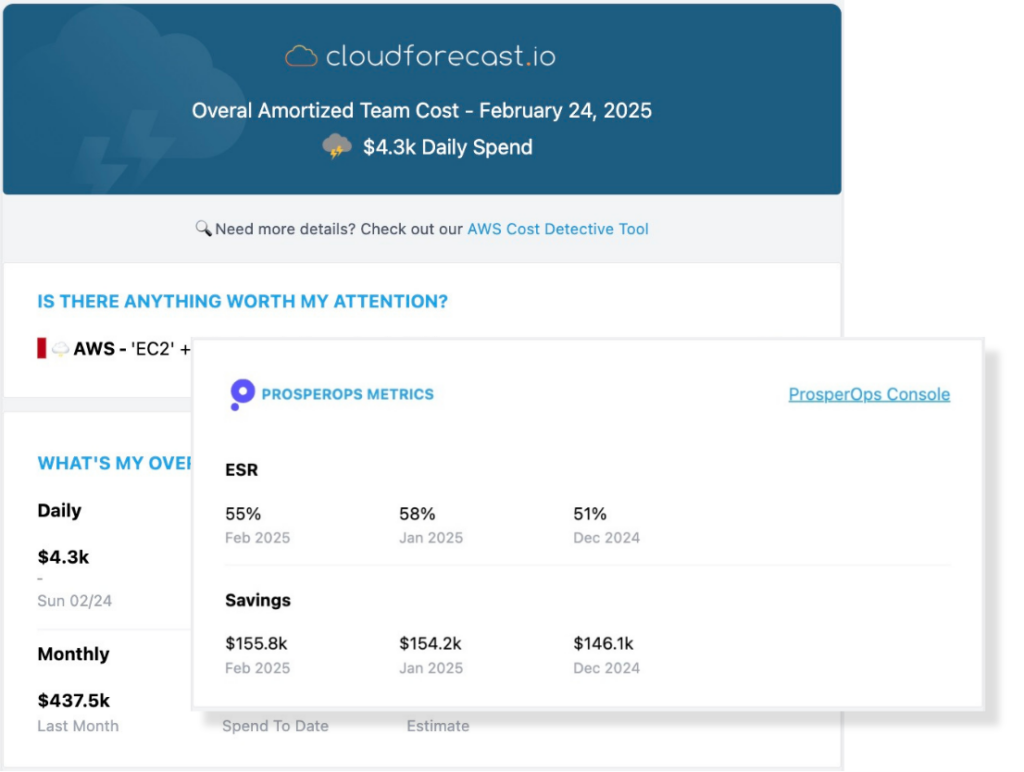
With this new add-on module, users can see a unified summary of their AWS costs from CloudForecast and the savings achieved through ProsperOps in one report sent daily via email, Slack, and Teams.
Requirements:
- Active CloudForecast Account
- Active ProsperOps Account
ProsperOps Data Export Configuration
Source: ProsperOps Data Export Introduction and Setup
Exports are made available at the AWS organization level. If you have more than one AWS organization managed by Autonomous Discount Management, exports must be configured for each organization. To configure Data Export for a given organization, follow these steps:
1. Open the ProsperOps Console, select the AWS Organization where you’d like to enable Data Export, and click on Settings under CONFIGURATION in the left navigation.

2. Click Configure in the Data Export settings panel and enter the S3 bucket name (must be globally unique per S3 naming rules) that will house the export files. IMPORTANT NOTE: Ideally, select the S3 bucket that CloudForecast already has access to, which can be found in the CloudForecast application. If the bucket doesn’t exist, please create it now. Click Next to continue.
NOTE: For data security and privacy purposes, since ProsperOps exports include organization wide data, the S3 bucket must exist in the management account of the organization (any region is fine).

3. In order for ProsperOps to write exports to the configured S3 bucket, the ProsperOps role in the management account must be updated with the necessary permissions. The provided IAM policy includes these permissions. Click Copy and apply the updated IAM policy to the ProsperOps role as appropriate. Once complete, click Validate & Enable.

If the S3 bucket does not exist or permissions have not been applied correctly, you will receive a detailed error message similar to the one shown below. Should that happen, correct the issue and click Validate & Enable again. If the issue persists, please contact us for assistance.

4. Once access has been validated, Data Export will be enabled and exports will begin within 24 hours. Last Export will show the last date-time an export was written (times shown are local).

Managing Setting Changes
- To pause or turn off Data Export, click the Disable button.
- To re-enable Data Export, click the Configure button and follow the steps above to reconfigure. You may use the same S3 bucket and permissions that were previously configured. Once enabled, gap data is backfilled, and you will have a complete historical data set.
- To change your S3 bucket name, turn off Data Export and re-enable using the new S3 bucket name. As part of the setup, you must update the ProsperOps role IAM policy and validate access.
CloudForecast ProsperOps Integration
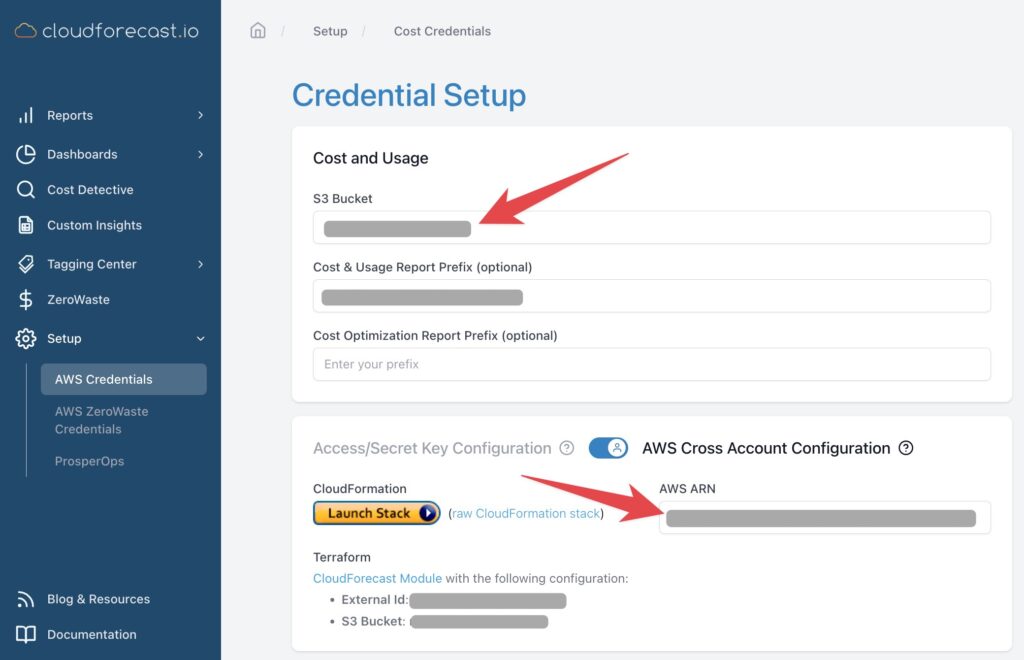
1. If ProsperOps Data Export is in the same S3 bucket (recommended setup) as CloudForecast CUR files, click “Setup” > “AWS Credentials,”
2. Copy and paste both the “S3 bucket name” along with the “AWS IAM Role.”
3. Go to “Setup” > “ProsperOps” and paste in the “S3 bucket name” and “AWS IAM Role”
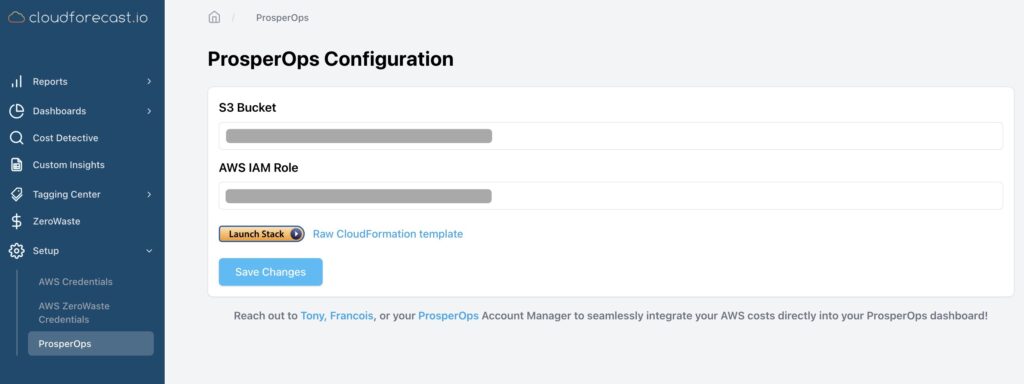
4. If ProsperOps is NOT in the same S3 bucket as the CloudForecast CUR files, you’ll have to establish a new set of permissions via CloudFormation by clicking “Launch Stack”, go through the CloudFormation steps, and pasting in the new “AWS IAM Role” into CloudForecast.
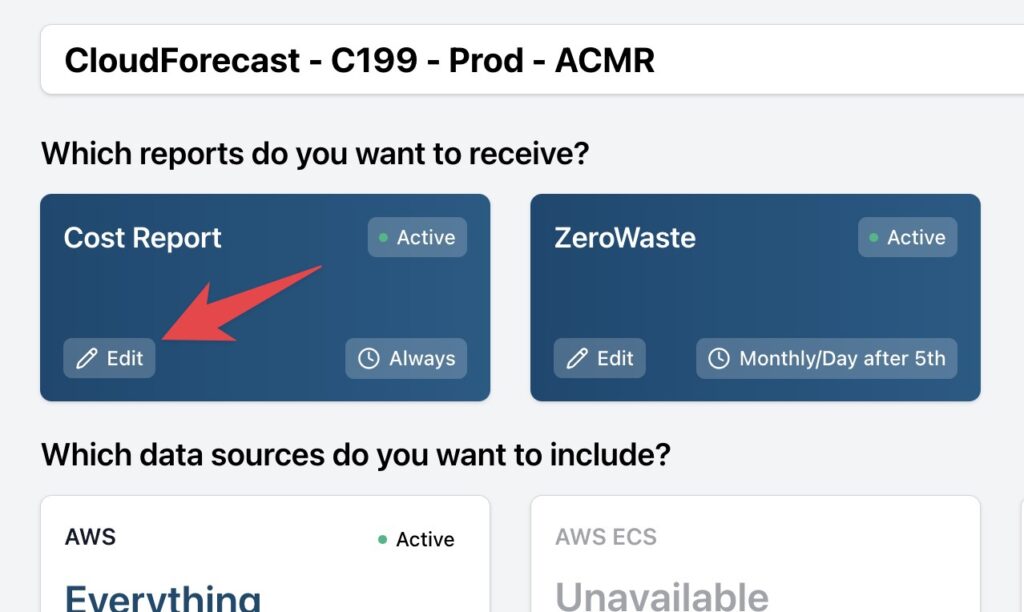
5. Go to any of your “Cost Groups” in CloudForecast and press “Configure”.
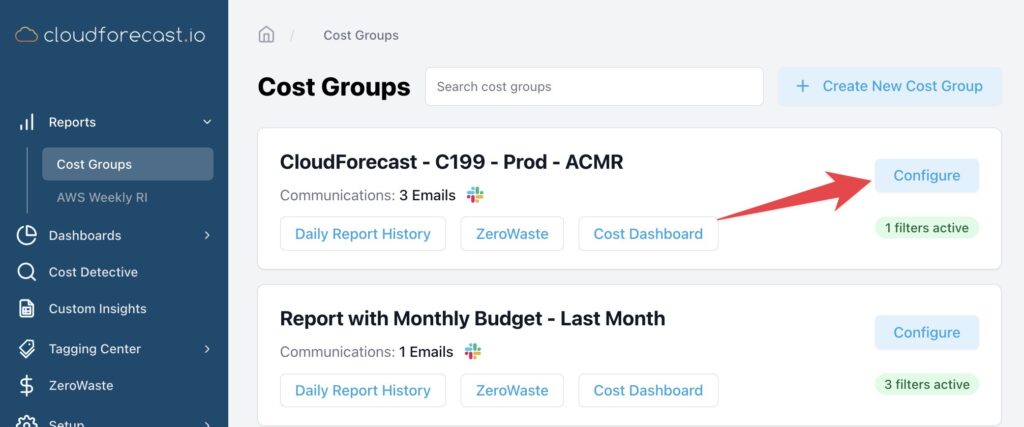
6. Press “edit” on “Cost Reports”
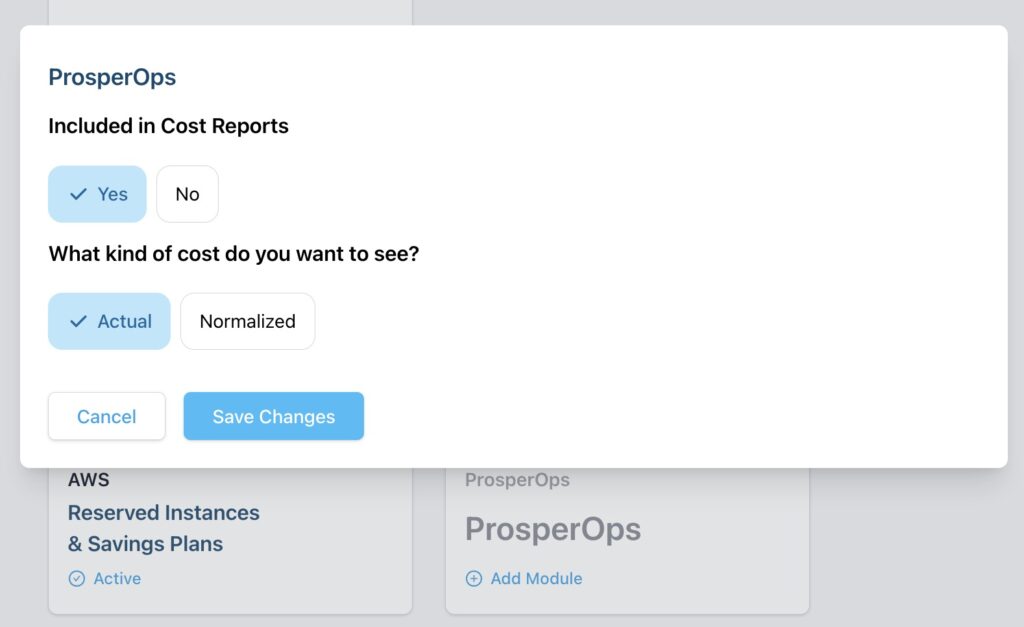
7. Under “Anything else you want to include?”, activate ProsperOps select “Yes” and “Save Changes”

8. Within 24-36 hours, a new ProsperOps module will appear in your Daily Cost Groups!