Using AWS Athena With Cost and Usage Reports (CUR)
AWS makes it straightforward and quick to integrate AWS Athena with your CUR. AWS users can universally agree that gaining insights into your AWS costs and usage is not easy. That’s why we published the Ultimate Guide to the AWS Cost and Usage Report (CUR). In it, we help you with step one of understanding your costs: enabling the CUR, a detailed report that breaks down all of the cost and usage metrics related to your account.
If you’ve already enabled the CUR, give yourself a pat on the back. But make it quick… we’ve still got work to do. Because on its own, the CUR is still relatively useless–it’s a large file with too many columns that will undoubtedly crash any spreadsheet software you try to view it in.
To understand your costs without subjecting Excel to additional torture, use the CUR’s native integration with Athena. This will allow you to leverage Athena’s powerful querying engine to write SQL queries against your CUR file. As we’ll see shortly, AWS actually makes it surprisingly easy to integrate your CUR with Athena. By the end of this article, you’ll have a fully working Athena setup that you can use to answer any questions you might have about your AWS costs.
What is AWS Athena?
Amazon Athena is a highly-scalable, serverless querying service. This means a couple things:
- Athena is built to handle SQL queries. If you’re familiar with SQL, Athena is the perfect integration for you.
- Athena is built to handle large datasets. Yes, that includes the CUR, thank you very much!
- Athena can run queries on data stored elsewhere. Such as S3, which happens to be where your CUR files live. This eliminates the need for you to transfer your data from S3 to another data warehouse for analysis.
In a nutshell, Athena allows you to query your CUR report using SQL, without having to do any additional hacky setups.
How To Integrate Your CUR With Athena
Like we promised, hooking your CUR together with Athena is not very difficult at all. Let’s jump right in. First, head over to the Billing console and ensure that your CUR report is set up to be integrated with Amazon Athena.
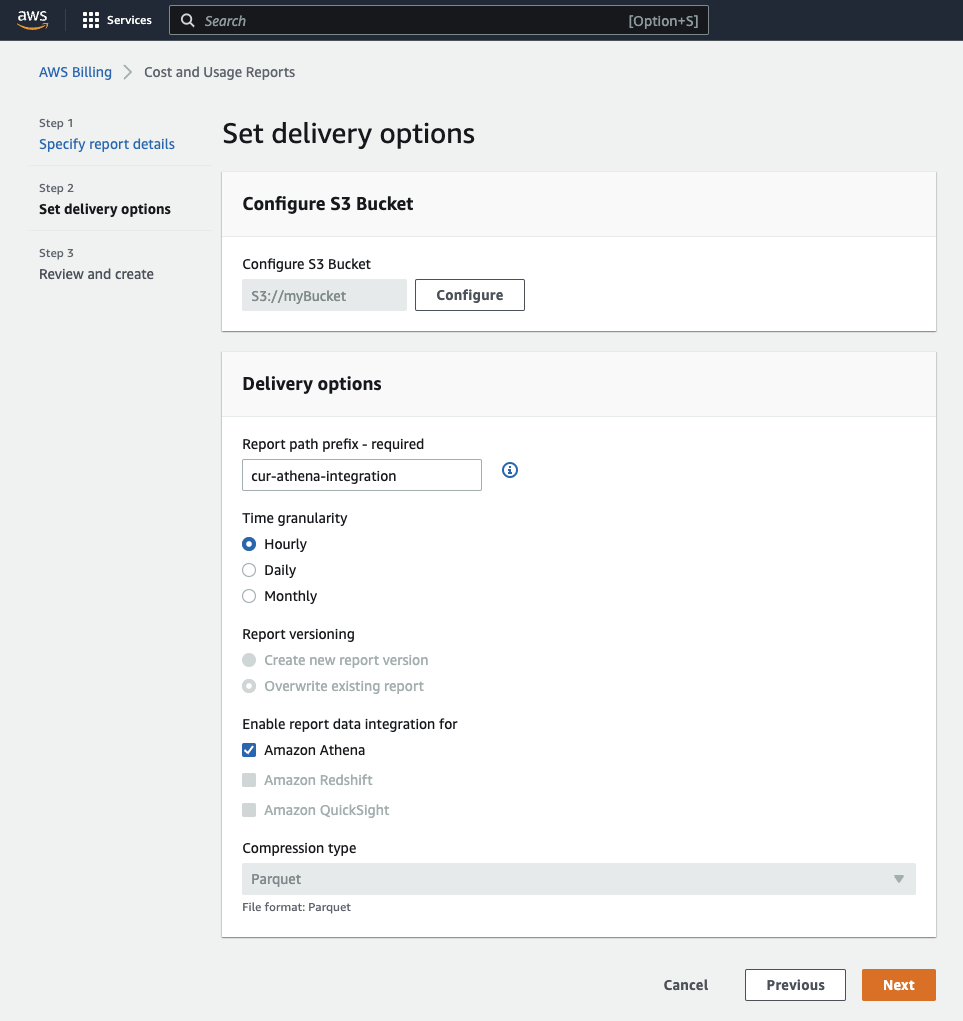
Note the Enable report data integration for setting in the above screenshot. If you’ve already created a CUR file with a different integration, don’t fret. You can still change your integration to Athena through the console.
When you pick Athena as your integration, three things happen. Firstly, AWS will automatically compress your CUR file into the Parquet format. Secondly, you’ll get a cfn-crawler.yml file, which we’ll talk more about soon. Finally, you’ll get two directories in your designated S3 location: one contains cost_and_usage_report_status, which describes whether your report is ready for querying (we’ll use this later on), and the other contains your CUR Parquet files, which will be named after your CUR report (for us, it’s cur-example-2).
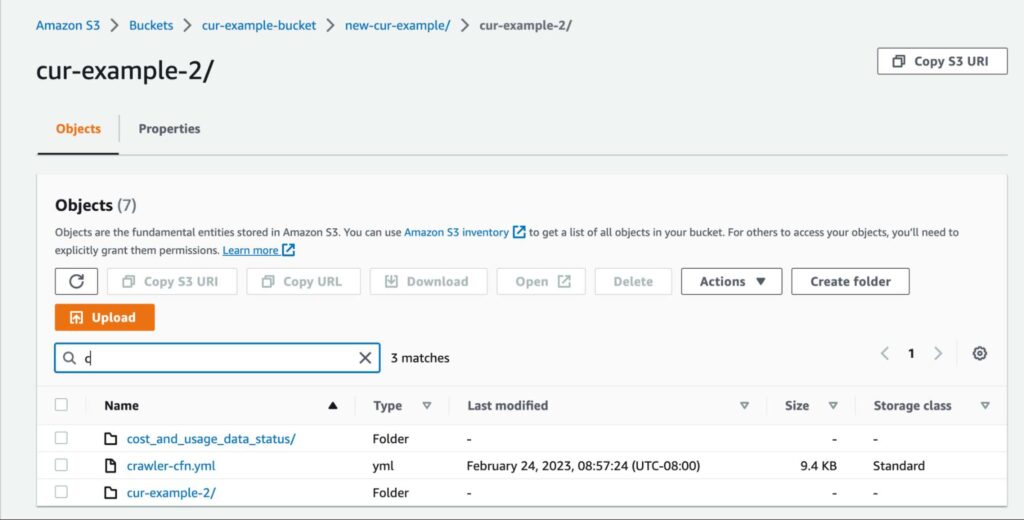
Check that you’re receiving your reports by examining what’s in the cur-example-2 directory (note: it can take up to 8 hours for AWS to deliver your first report):
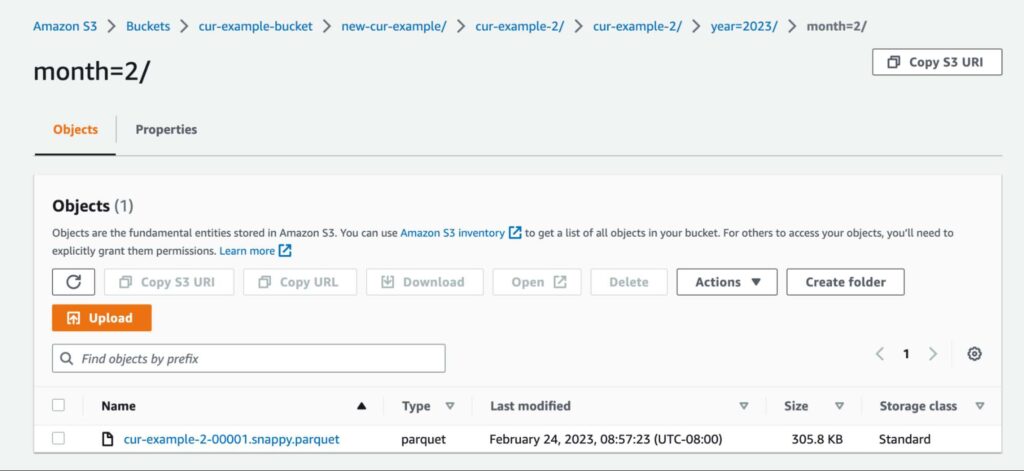
And that’s the basic setup! Once you’ve received at least one report, we can move on to the next steps.
Setting Up The Back-End AWS Glue Crawler Infrastructure
Remember how one of the main selling points of Athena is that it lets you query data stored in S3? Well, technically, this is not entirely true. Yes, Athena can still query from S3, but it needs to enlist help from an AWS Glue crawler in order to do so.
What is an AWS Glue crawler? Its purpose is simple: it will “crawl” our CUR file, determine its schema, and then put that schema metadata into the Glue Data Catalog. Athena then references this catalog to understand the CUR file schema in S3. Now that Athena knows what your CUR file looks like, it can then directly query said CUR file.
This kind of setup between S3, Glue, and Athena is a very commonly seen architectural pattern in AWS. For those who are interested, here’s a visual of this architecture:
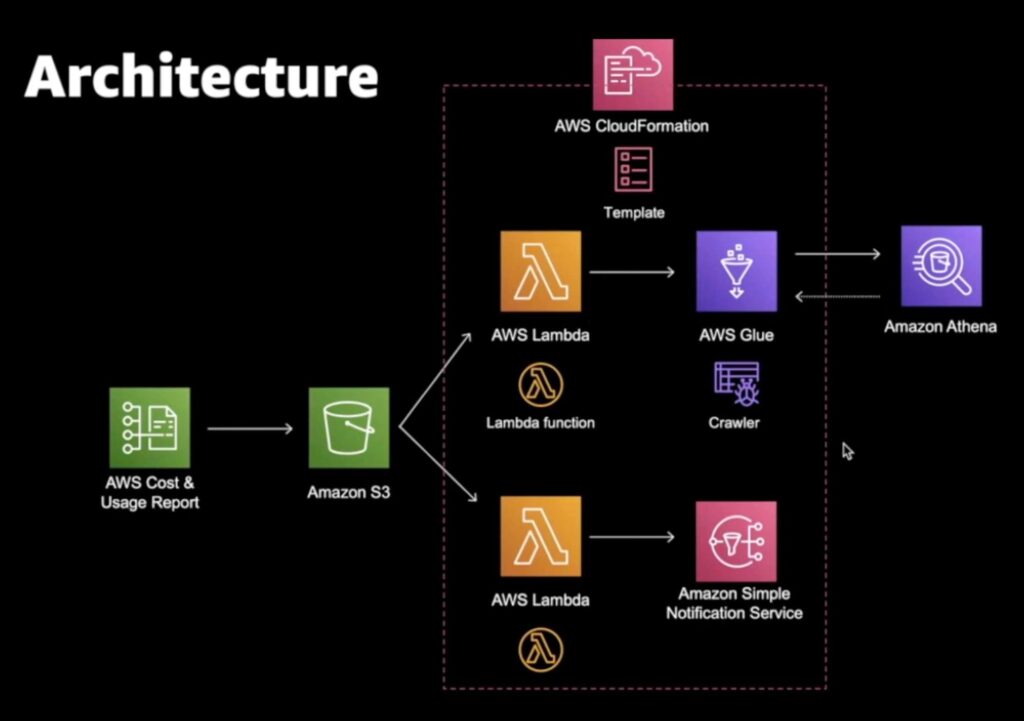
*Graphic is taken from Amazon Web Services youtube
In case you were wondering: yes, as part of this integration, we will have to set up our own Glue crawler. But if that sounds daunting to you, don’t worry! If you look at the diagram above, the entire connection between S3 and Athena is contained in a dotted box representing a CloudFormation stack. Remember that cfn-crawler.yml file from earlier which AWS so graciously provided us with? It’s going to come into play now.
The cfn-crawler.yml file defines the entire architecture we just described. Rather than set this all up ourselves manually, CloudFormation is going to do the work for us. All we have to do is deploy the CloudFormation stack. To do this, first navigate to the cfn-crawler.yml file and click on it to examine its properties.
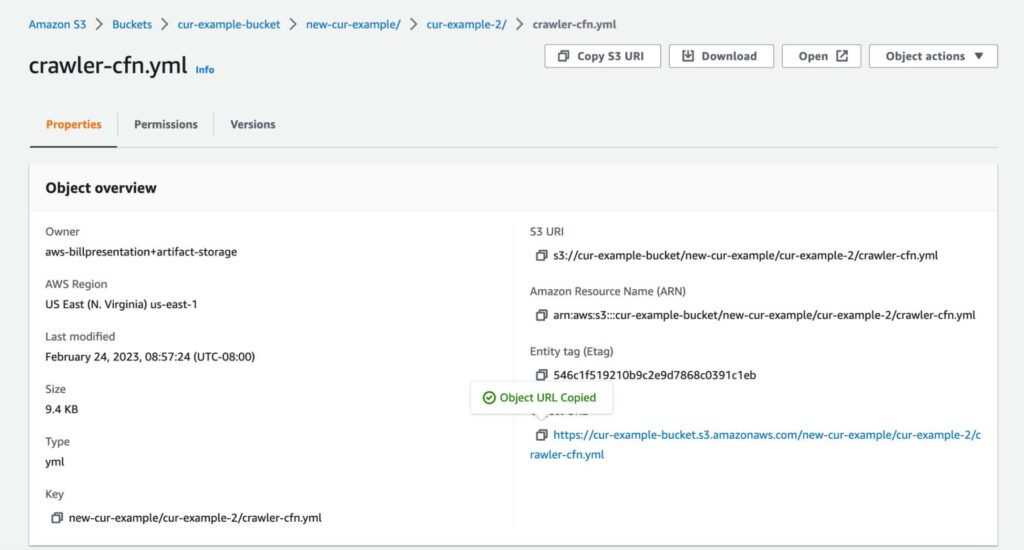
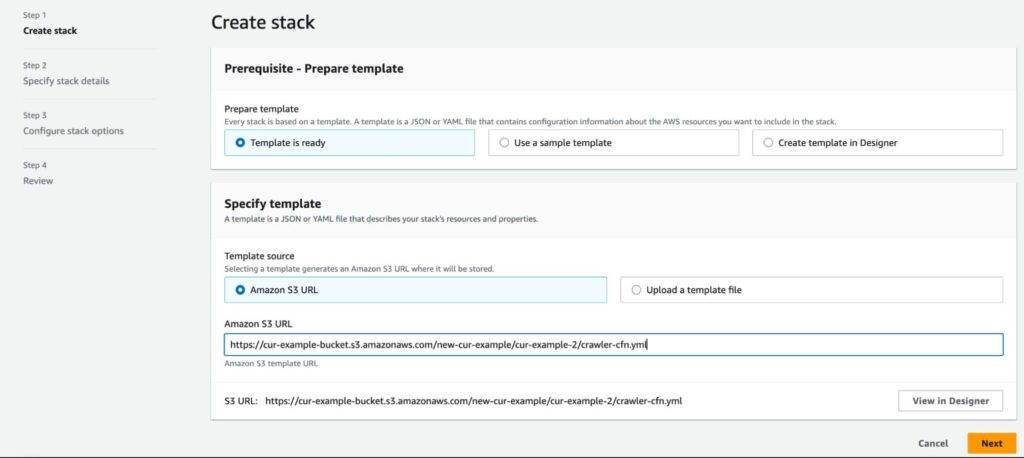
Under Object URL, click the copy icon to copy the URL to your clipboard. Then, head over to the CloudFormation console, and create a stack. In the first step, under Specify template, paste the Object URL into the Amazon S3 URL field.
Sit back, relax, and watch CloudFormation orchestrate building out the entire infrastructure for you. It shouldn’t take longer than a minute or two. Your completed stack should have the following resources:
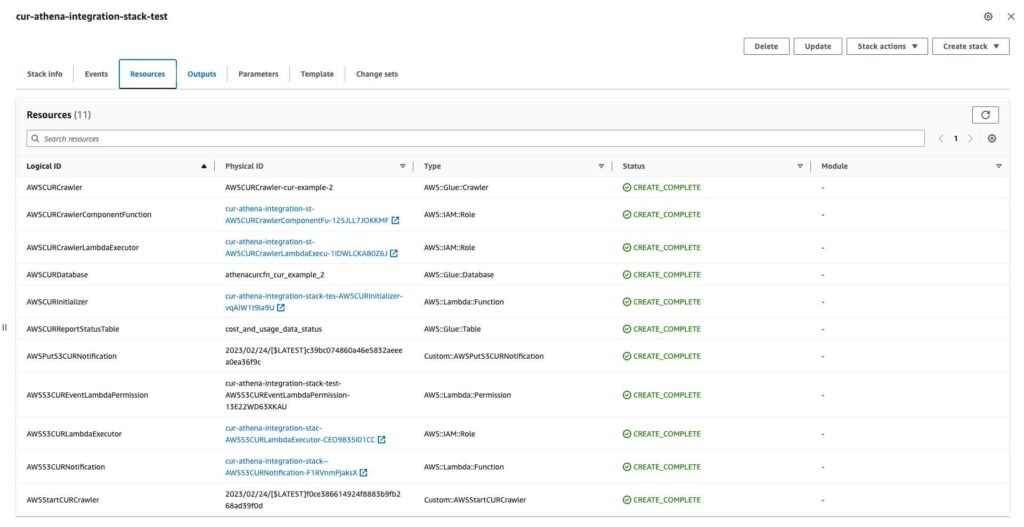
With that, we’re ready to start querying with Athena!
Testing Your CUR Integration With Athena
Time to reap the fruits of our labor (or rather, CloudFormation’s labor). Head over to the Athena console, and click into the Query editor. Before jumping into the SQL, let’s take note of a few things:
- In the left Data panel, under Data source, ensure that AwsDataCatalog is selected. This is the Glue data catalog that contains the schema metadata Athena needs to properly query your CUR.
- Also in the Data panel, under Database, ensure that the right database is selected (It will be the name of your CUR report, prepended with athenacurcfn-. In this example, it’s athenacurcfn-cur-example-2).
- With the above two selections, you should see two entries show up under Tables that correspond to the two directories that AWS CUR generated for you at the beginning of this tutorial: cost_and_usage_report_status and your CUR report name (in this example, cur-example-2).
- Before you can run queries, Athena might ask you to set up an S3 destination for query results. Choose any S3 location you’d like.
To verify that you’ve done everything correctly up until this point, let’s run a query on the cost_and_usage_report_status table. Paste the following SQL command into the Query editor, and hit Run:
SELECT * FROM cost_and_usage_report_statusIn the results pane, you should see that your CUR file is READY for querying:
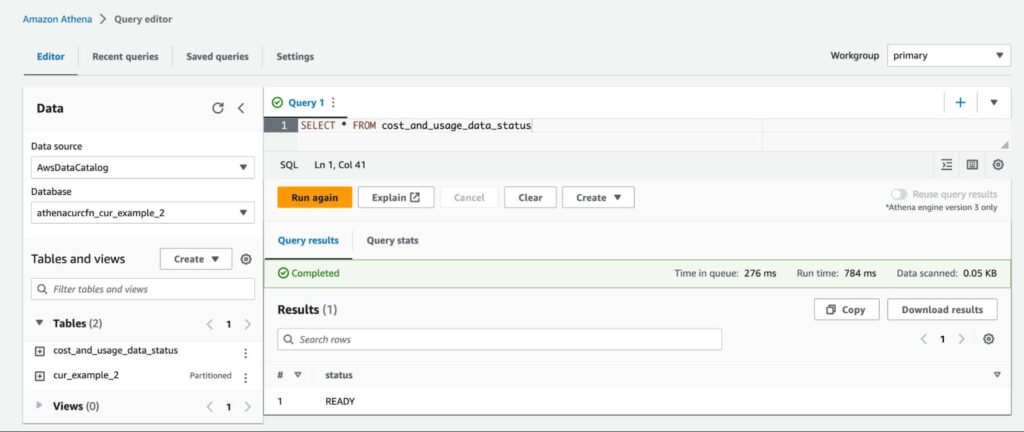
Awesome! Finally, we’ve arrived at the long-awaited step of being able to query our CUR file. For starters, let’s just run a simple query showing us the first two entires of our CUR file:
SELECT * FROM cur_example_2
LIMIT 2
As expected, we should get two results:
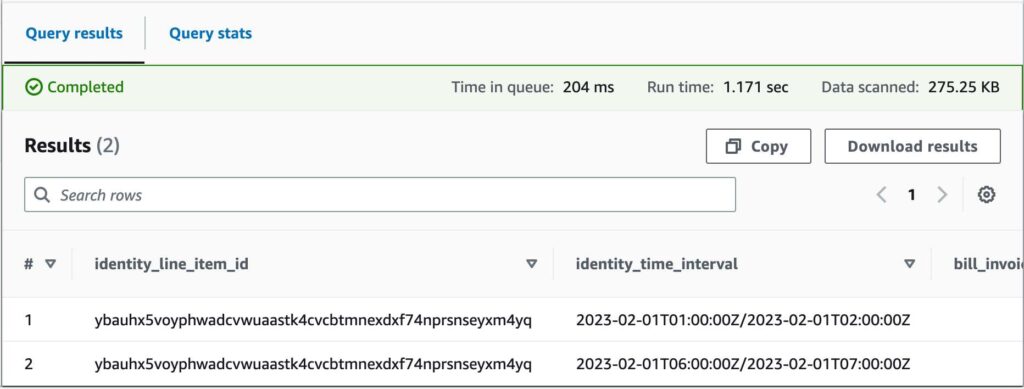
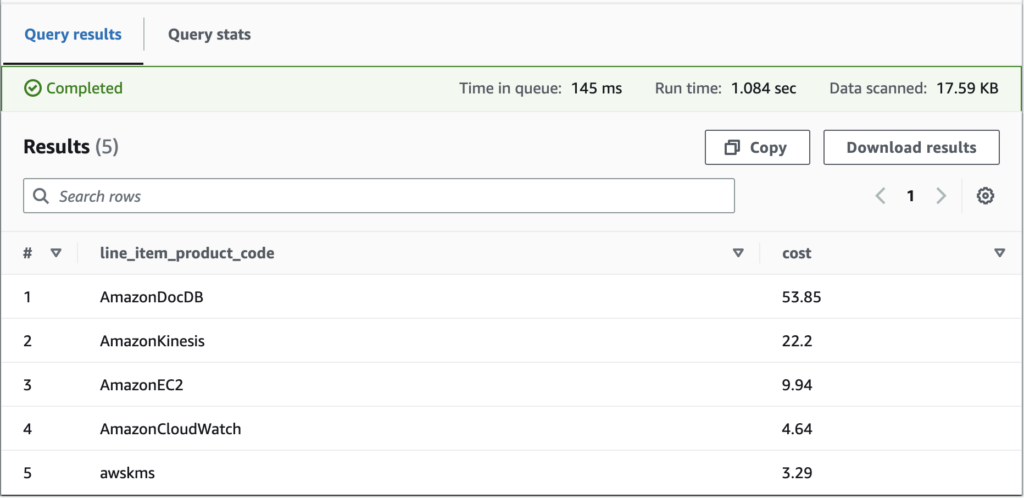
Let’s run something a little more interesting. Say we wanted to figure out the top 5 services that cost us the most money during a particular billing period (i.e. February 2023). For a better viewing experience, let’s also order them from most costly to least. Here’s a query that can help us answer that:
SELECT line_item_product_code,
		round(sum(line_item_unblended_cost), 2) AS cost
FROM cur_example_2
WHERE month(bill_billing_period_start_date) = 02
		AND year(bill_billing_period_start_date) = 2023
GROUP BY line_item_product_code
ORDER BY cost DESC
LIMIT 5;
This produces the following output:
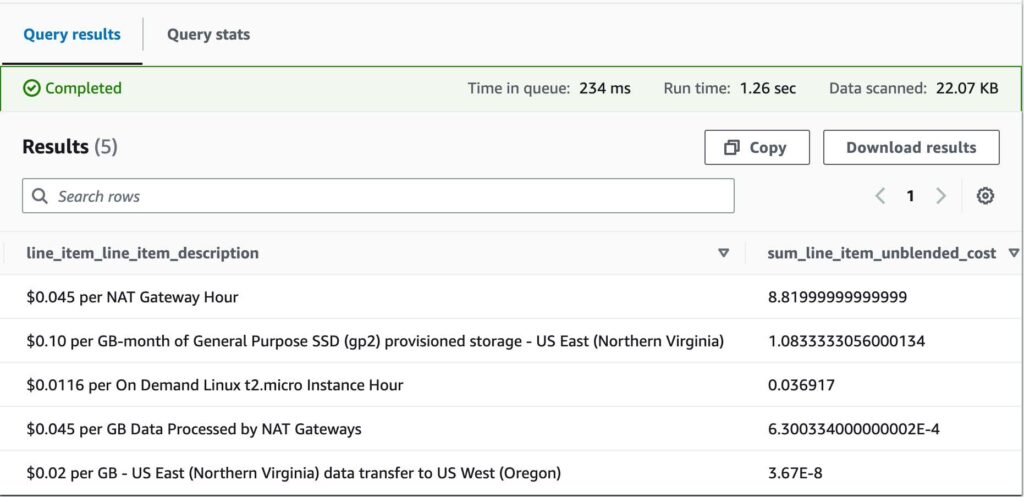
Another common use case is to breakdown costs within a service. The following query achieves this for EC2, and identifies the 5 highest categories of spend within EC2:
SELECT line_item_product_code, line_item_line_item_description,
	SUM(line_item_unblended_cost) AS sum_line_item_unblended_cost
FROM cur_example_2
WHERE month(bill_billing_period_start_date) = 02
	AND year(bill_billing_period_start_date) = 2023
	AND line_item_product_code = “AmazonEC2”
	AND line_item_line_item_type NOT IN (“Tax”, “Refund”, “Credit”)
GROUP BY line_item_product_code, line_item_line_item_description
ORDER BY sum_line_item_unblended_cost DESC
LIMIT 5;
This produces the following output:
Last but not least, to showcase the full power of this integration, let’s also bring cost allocation tags into the mix. Suppose that we define a custom cost allocation tag, Squirtle, which we apply to resources throughout our account (i.e. those that belong to the team codenamed Squirtle). When you activate cost allocation tags in your account, they start showing up as additional columns in the CUR–meaning that you can query on them using Athena as well!
As an example, here’s a query that only displays cost metrics for resources with the Squirtle tag.
SELECT line_item_line_item_type, resource_tags_user_squirtle,
SUM(line_item_unblended_cost) AS sum_line_item_unblended_cost
FROM cur_example_2
WHERE month(bill_billing_period_start_date) = 02
AND year(bill_billing_period_start_date) = 2023
GROUP BY line_item_line_item_type, resource_tags_user_squirtle
ORDER BY sum_line_item_unblended_cost DESC
LIMIT 5;
Running this query may produce an output that looks like this:
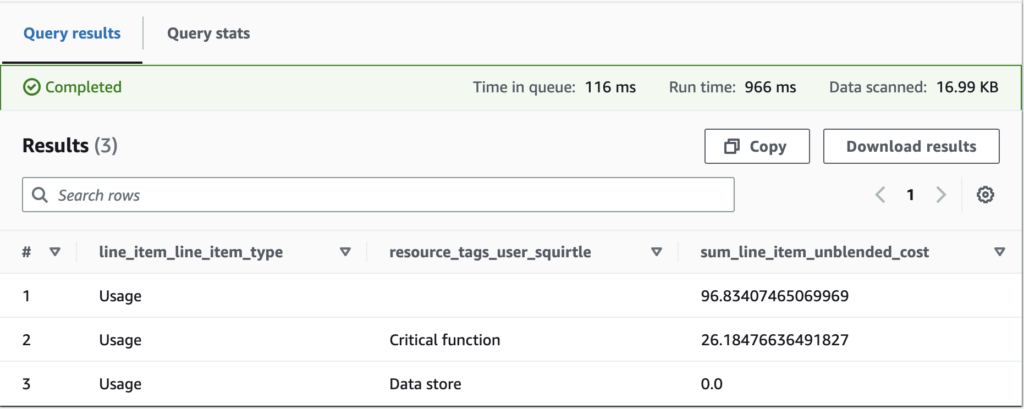
Cost allocation tags are just extensions of regular old tags, so they can have values attached to them too. Here, suppose we wanted to divide team Squirtle’s resources by those that are critical compute functions, and those that classify as data stores. Thus, we create two possible values, Critical function and Data store respectively.
In our result, team Squirtle’s critical functions cost $26.18 in total, and data stores cost $0 (for now!). However, approximately $96.83 worth of costs are allocated to resources that have the Squirtle tag key, but no value assigned to them. Perhaps team Squirtle needs to spend some time refining their tagging strategy so that all costs are classified properly.
Conclusion
This article introduced you to the possibilities of an AWS CUR integration with Athena. The best news is that setting this all up requires minimal effort–AWS provides a CloudFormation template that deploys all the required infrastructure for you. Once you’re set up, it’s just SQL from there!
We showed you a couple common queries to get you started with understanding your costs. For even more examples, visit the CUR query library at AWS Well-Architectured Labs. If you want the ultimate visibility into your AWS usage but prefer a SQL-less approach, also consider CloudForecast’s Cost Monitoring tool for all your cost-understanding needs.
Manage, track, and report your AWS spending in seconds — not hours
CloudForecast’s focused daily AWS cost monitoring reports to help busy engineering teams understand their AWS costs, rapidly respond to any overspends, and promote opportunities to save costs.
Monitor & Manage AWS Cost in Seconds — Not Hours
CloudForecast makes the tedious work of AWS cost monitoring less tedious.
AWS cost management is easy with CloudForecast
We would love to learn more about the problems you are facing around AWS cost. Connect with us directly and we’ll schedule a time to chat!
